Texmix 25 – Easy install kit Setup.

Texmix 25 – Easy install kit Setup.
Parts list
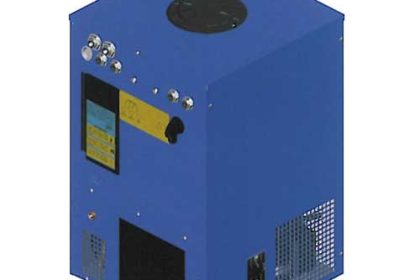
- Temix 25 unit
- CO2 Regulator
- Water Filter assembly
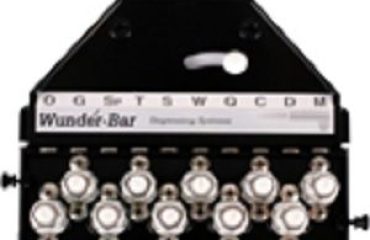
- Syrup Pump Board
- Extra 6mm line/hose
- Extra 10mm hose/line
- Selection of clamps
- Selection of stainless steel barbs
- Pincers Tool for closing clamps
- Shears for cutting pipe.
Pre-setup
If coke/Pepsi remove their system before we installed the new one, this makes installation a little harder in the sense that you would have to locate what each of the python lines are, at all 3 locations (cellar and 2 guns). This is not to hard but it does add to the job.
So it is easiest to Install the new system as you remove the old one this way you can directly change over the lines without confusing them.
The very first thing you need to do is turn off and depressurise your system otherwise you will have water, gas and syrup exploding all over the place.
To do this you need to
- Turn off the power
- Turn off the water at the tap
- Turn off the gas bottle
- Once that is done disconnect you syrup boxes
- Then hold down all the buttons on you syrup gun until all the syrup, soda and water comes out.
Now that this is done we are ready to start
SYSTEM OVERVIEW
Setup
Step (1) Machine Placement
- Place te-mix 25 in a location where it will be set up either on shelving or ground
- Remove lid (held on with single Philips head screw)
- This machine needs to be filled with water, looking into the machine from the top you will see a set of copper and stainless steel coils (pipes) the copper pipes on the outside are the refrigeration coils, while the stainless steel coils in the middle are the product chilling coils.
Fill the machine with cold tap water until the water covers the top of the copper coils, there is an overflow tube on the machine and any excess water will drain, also when the machine is turned on and the machine gets down to temperature it will form ice over the copper lines, when this happens you may see excess water drain out of the overflow.
- Plug the machines power supply into a 10Amp point. (don’t turn on yet)
Machine internals Video tutorial
Attaching the python line to the new machine
You should have 2 python lines that you identified as water and 2 as soda from your old machine, these may be marked, If they are not there are 2 ways to identify them, these lines will be coming out of your old unit.
- Cut the lines open and taste what’s inside, 2 will be carbonated water and 2 will be still water.
- Cut all 4 lines and attach a water or gas hose to 1 of the lines this will flow through identifying the circuit.
It is very important to identify the water and soda lines correctly, if you don’t you will get soda in the still water and week watered down soda. Once identified mark the lines.
Connecting the soda and water lines to your new machine
Soda Lines
- On the front of the Temix located the line/hose for the Soda out and attach it to one of the python lines from your old machine you marked as soda (to attach the line, put a large clap over the line and push the line/hose into the stainless steel barb, then tighten the clamp over the barb using the provided pincers)
The soda out connection on the machine is the insulated line on the left side of the machine marked OUT and it only has 1 single Barb (please refer to video for greater detail)
- The second Soda line on your python is attached directly to the inlet Barb on the external pump (please refer to video for greater detail) It does not matter what soda line becomes inlet or outlet as it makes no difference what the flow directions through the python.
Still Water Line
- On the front of the Temix located the line/hose for water out it is the insulated line with 2 barbs, (please refer to video for greater detail) attach it to both of the python lines you marked as still water (to attach the line, put a large clap over the line and push the line/hose into the stainless steel barb, then tighten the clamp over the bar using the provided pincers)
- At this time the machine can be plugged into the power point, But please leave it turned of at the switch.
Step (2) Water Filter Placement
Water filter –
- The water filter is assembled and just needs to be installed.
- Place the water filter in a location close to the water outlet, usually attached to the wall.
- The left side of the water filter is the water inlet this is also the side with the copper pressure regulator, the right side is the outlet going to the machine.
- Run a line/pipe from the right side of the water filter to the post-mix machine – run the line from the outlet of the water filter to the temix 25 unit, you will see a clear uninsulated with a single barb for the H20 on the inlet (right-hand side) of the machine (please refer to video for greater detail),
Using the pipe provided run a length of the pipe to the correct length as needed, place a clamp over the hose the push the hose end into the stainless steel barb, then tighten the clamp over the end of the barb.
- Included is a ½ inch push in fitting, this needs to be attached to the appropriate cold water outlet/tap. This needs to be attached correctly using plumbing tape or a lock set paste to prevent leaks.
- Once the fitting is in place, run the line from the water filter to the just installed fitting, trim off any excess pipe and push the pipe into the fitting
- Don’t turn the water on yet
Step (3) Syrup pump Board
Pumps board – Tutorial –
The Temix 25 runs standard 6 Flavours, each flavor has its own pump.
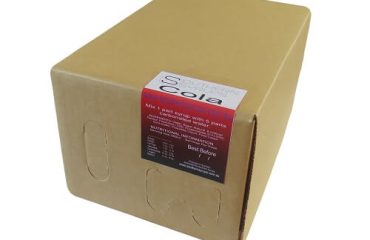
Each pump has a clear tube running to it, this line is the one you connect to a syrup box
Each pump also has a single free barb fitting on it, this is for the syrup line to the python.
This system does not include shelving, however, if it is needed we recommend using a standard shelving system from a hardware store (Bunnings has a great rang at great prices, the actual syrup box shelving is ridiculously priced and no better than this stuff)
- Affix the pump board to where you want it to go, usually a wall or on a shelf out of the way, close to where the boxes will go. (there are screw holes at either end of the pump board for mounting)
- Connect the syrup pumps to an outside exhaust – On the left side of the bump board you will see a stainless barb connected to a hose network that joins all pumps, this is the C02 exhaust system, this is connected to a pipe that goes outside and carries ’s away any C02. Either attach to the existing system from your previous installation our run a new pipe using the extra line provided.
- Connecting the syrup lines – each pump has a single stainless barb fitting on it, each one of these needs to be replaced with the existing syrup lines in the pumps.
Do one pump at a time, and do this process for each pump
- Choose a flavor and locate it on the old pumps, do this by (for example) choosing the coke line, follow the pipe from the box of syrup to the flowjet pump it is connected to.
- In front of the clear pipe you just traced from the box, there should be a colored python line attached to a single barb.
- Remove this barb by sliding the locking mechanism to the right (please refer to video for greater detail)
- Take this line with the fitting attached to the new pumps, remove the barb that is in the new pump and replace it with the python line from the old pump.
- Follow the clear pipe down on the new pump to the fitting then attach a box of coke to it
- Mark the pump with a C or the word coke for future reference.
- Repeat for all six flavors
You should now just have a clear co2 inlet line that needs to be connected, we will cover that in the next section.
This is a video explaining the syrup board and what each part and connection does
Step (4) CO2 Gas regulator.
CO2 regulator – tutorial –
- Connect the CO2 gas regulator to the C02 bottle, this regulator is a wall mounted model and is fitted with a hand heightening grip so no tools are needed when hooking up a new bottle. (make sure you don’t have pub or beer gas as any gas with nitrogen content will flatten your drinks)
- Choose a location close to your machine and gas bottles and firmly attach The CO2 board to the wall
- Attach the gas bottle with the hand tightening fitting (don’t over tighten) turn on the gas bottle (gas won’t come out as each line has a shut-off valve that is turned off, Don’t open them yet)
- There are 3 gauges on the regulator
Under the first 2 gauges, there is an adjustment screw (flat head screwdriver is used to adjust this screw)
- The first from the left is the gas pump supply (closest to the bottle), using a flat head screw driver turn the adjustment screw clockwise until the gauge reads 40psi (psi is the red number)
- The second gauge is the Co2 supply for the post mix machine, turn the adjustment screw until the gauge reads 100 psi
- The third gauge shows the gas bottles pressure (how much gas is left in the bottle)
- At the bottom of the regulator, there are 2 outlets barbs
The first from the left is for the syrup pumps.
Run clear 6mm line to the C02 inlet on the syrup board – you will see on the syrup board a copper barb under the bottom left syrup pump (please refer to video for greater detail)
place a small clamp over the hose at each end, cut the hose to the desired length then push it onto the stainless steel barb then tighten the clamps.
- The second outlet line on the regulator needs to run to the post-mix machine,
On the front of the Temix unit, you will see a clear line with a push in fitting on the right-hand inlet side of the machine.
Run a clear 6mm hose to this push in fitting and push it in securely, attach the other end of the line to the CO2 regulated and clamp in place.
Step (5) Gun setup
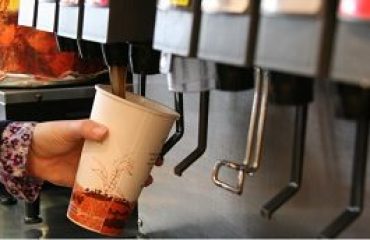
The guns are meant to be factory set to a ratio of 1 – 5, however this is not always the case if you believe the syrup is to strong or weak and requires brixing please see our instructional video on how to do it as we have included all the required parts
Changing the guns –Tutorials
There are a couple of option for swapping over the guns and I have covered them here in this video
or
More info
https://youtu.be/Ggk4IRWVZvA and https://youtu.be/2qtyykqj8xQ
We will assume that your choosing to use the new manifold , rather than the old ones for this tutorial
- Remove the gun base from where it is mounted
- Line the new gun up next to the old gun with the bases facing the same way
- Starting at one end, remove 1 on the pins holding the syrup lines in place (please refer to video for greater detail)
- Pull out the syrup line
- Find the same hole on the new gun
- Lift the leaver for that hole
- Push the line in
- Lower the leave
- Check it is secure
- Do this for all line
- On all guns
- Once the lines are in place, attach the gun to the desired location
- Install the gun holder by screwing it into place.
Brixing a gun – tutorial –
Step (6) It all comes together
- Turn on the Water supply at the tap
- Turn on the machine at the power point
- Turn on the Gas regulator at the shut of valves on the regulator and gas bottle.
When you turn on the gas you will hear the gas pumps pumping the syrup from the boxes to the machine, filling the lines,
The machine will make soda water. Give the machine a few minutes to fill with water and pour 5L of soda through the machine to purge any air from the machine (repeat 2-3 times until the soda flows freely and all plain water is purged)
Hold down each button, in turn, to pump syrup through and get rid of any air bubbles.
At this point the machine is set up, however the machine will need to run for several hours to get down to temperature, the soft drink will come out a little flat until it is down to temperature, (post mix needs to be served at 4 deg C or lower to keep it carbonated 2 deg c is the ideal temperature))
.
Fitting, tools and parts included
If you require any extra pipe, fitting or help please let us know we are here to help


You must be logged in to post a comment.